Group 34 General Info
8 threads - 23 total comments
This section is for comments and discussion outside the monthly image dialogue.
Thread Title: My take on creativity
My motto regarding creativity has always been 'What If?' rather than 'What Is!' Posted: 09/18/2023 04:41:03
A very good motto it is! Posted: 09/19/2023 10:38:22
Sometimes all you need is "What?" Posted: 10/03/2023 12:30:01
Thread Title: Altered Reality Discussion
Since we are designated as a Creative Group, Iââ¬â¢d like to engage in a group-wide discussion of what each of you considers to be photographic Creativity. The PSA description of our group states:
ââ¬Å“This section is not for beginners but is for those whose images are dedicated to altered reality and who have longtime experience in Adobe Photoshop. In other words, this category is designed for the créme de la créme of digital imaging. These members are committed to altering the image so that it departs from the reality of the original photograph. A camera or other light gathering device could never solely capture such images as they appear in the altered image.ââ¬
What do you consider altered reality to be? Is it something that couldnââ¬â¢t possibly exist in real life? Or is it simply changing the original image in a way that a camera couldnââ¬â¢t capture in a single image? When you set out to create your image each month, how do you make it conform to that requirement? Do you think you would feel more freedom to create photographic art if you didnââ¬â¢t have that label to worry about? If you were only required to be ââ¬Å“creative,â⬠would you explore more diverse ways to express yourself with your monthly image? Would you enjoy the DD experience more? And while weââ¬â¢re on the subject, how do you determine whether an image is Creative?
I invite each of you to comment on these questions, or ask some of your own. Our direction as a group can be tweaked to our liking, as long as it remains dedicated to Creativity.
To weigh in on this discussion, you need to be signed in to your DD account so that you can see and click on the black ââ¬Å“Replyâ⬠box. Please chime in. Your opinion is important.
Posted: 09/17/2023 14:08:54
PSA describe creative as 'altered reality', so for me, anything that fits this description goes.
It may be something that could exist in real life - for instance 'the anchorage' which is a composite of several images, but could be seen as a captured image.
Equally, it could be something that has obviously been created because it couldn't exist in real life.
Using photoshop, or plugins to make images appear completely differently is also acceptable to me - but preferably not just a straight 'one click' of an application - it should be further worked on in various ways to get the final image. So, the use of AI as shown in the latest Photoshop edition can't be classed as 'creative'.
We've had images which have been caught on camera, using different creative techniques which have also been acceptable, so we don't need to rely on Photoshop.
Anything goes, provided it's not a 'one click' operation and it's well described.
For me, the enjoyment of the group comes from viewing members' images that make me smile, and from learning new techniques and ideas - so it's important that the steps taken in achieving a final image are explained.
Mainly, I like to have fun with my hobby, so playing with images is just that. And hopefully I'll make someone smile sometimes! Posted: 09/17/2023 15:05:10
Amen to having fun with our hobby Steve! Maybe I have a narrow view of "altered reality" because it feels constraining to me. The camera club I used to belong to put more value on that phrase than they did on making a creative and well composed image in post processing. The sentence that resonates with me from the PSA directive is "These members are committed to altering the image so that it departs from the reality of the original photograph." And like you, I feel an image must show multiple steps in the process in order to qualify as creative photographic art. Posted: 09/19/2023 11:02:01
First of all, Jan, thanks for taking this initiative. Interesting topics. I have to stay that the PSA groups I belong to, have been extremely helpful in my photographic journey.
As time has gone by, I'm becoming more and more interested in the Creative aspects of photographic art. AI is becoming an interesting and important wrinkle in creating art - but that's another whole topic!
As far as PSA Altered Reality is concerned, there is a PSA definition that I suggest is a 'must read' - kind of complicated, but does answer a lot of questions people have. Look for "PSA Definition of Creative Photography" on the PSA website.
I personally do not use this as a Rule, but as a Guideline. There are so many levels of Altered Reality - everything from a 'on-click' color change, to a 3+hours of digital manipulation. The way I see it, if the photographer sees their image as fitting (mostly) the PSA criteria - it's Altered Reality. As a viewer, we all have our own criteria and perception of the topic and act accordingly. There is no good or bad Altered Reality art - there is only Altered Reality I like, or not like.
For me, the PSA Altered Reality criteria is not the least bit constraining - and if it were I would not be in a Creative group. Having said that, I do struggle with the Abstract genre - which I also really like - and hesitate calling it Altered Reality, because '.....images core content must be identifiable'. I think Abstract does not have to show any reality, whatsoever.
Lastly, I think I'm attracted to the Creative aspect, as I have very little patience for 'cliche' pictures - i.e. no more sunsets, landscapes, desert canyon spectaculars.
That's my story, and I'm sticking to it!!!!
Posted: 09/19/2023 12:39:02
I tried looking up the definition you referred to on PSA website, but couldn't locate it. At any rate, I've decided to adhere to the phrase "altering the image so that it departs from the reality of the original photograph," and not get personally hung up on whatever Altered Reality might mean. I completely agree with you that Creative Photo Art is SO much more fun and fulfilling than snapshot photography. Posted: 09/20/2023 15:49:06
I agree with Steve E. that a creative image can be a created, composite image or an image out of the camera that has been altered with multiple plug ins, textures or other software. The steps to arrive at the final image are most important and should always be included in the makers description. Altered reality doesn't always need to be some strange way out image. This is a group that has many options to use to arrive a final product, and I don't feel that we should always question if it is altered reality. Posted: 10/02/2023 15:22:56
I agree especially with your last sentence Candy. Being Creative, to me, is more important than getting hung up on whether an image fits the technical description of Altered Reality. Posted: 10/03/2023 11:05:48
An absurdist's abstract...
The definition for PSA competitions needs to be specific. This group is not a competition. While whether it is 'creative' or meets the requirements for display are part of what we're here to discuss, we are mostly here to discuss techniques, and the results of those techniques. Therefore, no profound definition is necessary other than that the image be altered in a way that is noticeable when compared with the original. As incongruous as it sounds, the images shared here should 'by definition', not be confined to definition. Posted: 10/03/2023 11:38:20
The definition for PSA competitions needs to be specific. This group is not a competition. While whether it is 'creative' or meets the requirements for display are part of what we're here to discuss, we are mostly here to discuss techniques, and the results of those techniques. Therefore, no profound definition is necessary other than that the image be altered in a way that is noticeable when compared with the original. As incongruous as it sounds, the images shared here should 'by definition', not be confined to definition. Posted: 10/03/2023 11:38:20
Steve - I agree 99% with your observation. The only point Iââ¬â¢d make is, there is a difference between Abstract and Altered Reality. My definition of AR must show some reality still noticeable in the image. Reality in an Abstract is by choice.
At the end of the day, the maker decides what AR is, and the viewer can only either like it or not, and provide the reason, as with any other image in any genre. Posted: 10/03/2023 12:21:19
At the end of the day, the maker decides what AR is, and the viewer can only either like it or not, and provide the reason, as with any other image in any genre. Posted: 10/03/2023 12:21:19
Gunter, Your definition is as good as any. :) Posted: 10/03/2023 12:24:29
Thread Title: Make Your Own Textures
Recently, I was asked about textures. It is so easy to make your own. Of course, you can photograph textures all around you. But you can also make textures out of an image that has the color pallet that you wish to capture in a texture. I searched for classic images on the Internet, because I love the colors in most of those old images. I also used some of my own flower images.
1. Select your image and open it in PS CC.
2. Copy the first layer (Ctrl J).
3. Make any color adjustments you wish with Adjustment layers.
4. Play with your image. Here are a few tricks I used.
a. Copy the image to a new layer and invert that layer (Edit > Transpose > Invert (horizontal and/or verticle)
b. Change the blending mode on the inverted layer. Just page through the blending mode with the down arrow key on your keyboard.
c. Merge up to include a merged layer on top of your underlying layer, without loosing the underlying layers (Cntl Alt Shift E)
d. Take a merged layer into Topaz Studio Impressions and find an effect that you like and save it. You can also play with the properties of any effect, e.g., change the brush, change each color, smudge it, etc.
Here is a flower I put on a texture background that I created from a classic angel picture I found on the web. Posted: 06/12/2020 15:25:06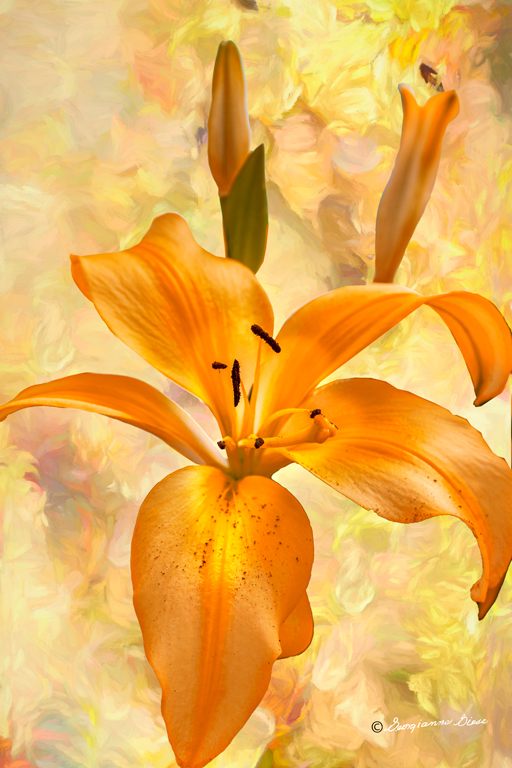
Thread Title: Outlining Images in Photoshop
CREATE AN OUTLINE OF AN IMAGE IN PHOTOSHOP
1. Select an image and keep the Marching Ants visible
2. CTRL-J to duplicate the image with the marching ants
3. Click Hue/Saturation Adjustment Layer
4. Click "Clipping Mask" in Properties Panel to adjust only the layer directly under the adjustment layer you are using (It's a square, the first of 5 icons at the bottom right of the properties panel)
5. Drag the lightness slider all the way to the left creating a silhouette
6. Close the property panel
7. Select the layer with the Adjustment Layer, right click, and "Merge Down" the Hue/Saturation Adjustment Layer with the silhouette layer
8. CTRL-Click the image to reveal the Marching Ants if they are not present
9. In the menu bar at the top of the screen, click Select > Modify > Contract
10. In Contract Selection dialogue box, "Contract By" 7 pixels
11. The Marching Ants will shrink away from the edge of the image
12. Use the Move Tool to click and drag the silhouette away from the image leaving an outline
13. Delete the image with the marching ants
14. Click the Lasso Tool in the tool bar to eliminate the bounding box
15. What is left is an outline of the image
16. You can make the silhouette any color you like and the outline will be the color of that silhouette
Posted: 05/22/2020 17:32:49
Thread Title: Making Twirls
Here's the link provided by Georgianne, to make the wonderful twirls:
https://www.slrlounge.com/twirls-hot-new-photoshop-trend/ Posted: 02/12/2018 15:12:15
https://www.slrlounge.com/twirls-hot-new-photoshop-trend/ Posted: 02/12/2018 15:12:15
Thread Title: Photoshop Feature List
You can download (or view) a PDF with a full listing of PhotoShop features, version by version.
https://indd.adobe.com/view/c7191893-fc7c-4b41-b61a-130dd125a1e7
Phil Posted: 01/25/2018 12:55:45
https://indd.adobe.com/view/c7191893-fc7c-4b41-b61a-130dd125a1e7
Phil Posted: 01/25/2018 12:55:45
Thanks again Phil - it's downloaded. Posted: 01/25/2018 15:50:48
Thread Title: Lightroom Goto Source
Greetings and Happy New Year to all.
Perhaps you all know this, but if you are using Lightroom and ever have a problem or question, Victoria Bampton is the goto source. Check out https://www.lightroomqueen.com/
Posted: 12/29/2017 19:33:57
Perhaps you all know this, but if you are using Lightroom and ever have a problem or question, Victoria Bampton is the goto source. Check out https://www.lightroomqueen.com/
Posted: 12/29/2017 19:33:57
Thanks Phil
She's bookmarked and I've downloaded the free books. Posted: 12/30/2017 04:10:40
She's bookmarked and I've downloaded the free books. Posted: 12/30/2017 04:10:40
Thread Title: Photoshop Plugins
Some Useful Software Links for Photoshop Plugins - the programmes in brackets are the ones I use regularly. Hope you find them useful:
Alien Skin (Eye Candy and Exposure) https://www.alienskin.com/
Anthropics (Portrait Pro and Portrait Pro Body) https://www.anthropics.com/
Flaming Pear (Flood) http://www.flamingpear.com/
Topaz Labs (lots of useful programs) https://www.topazlabs.com/
Redfield Plugins (Fractalius) https://www.redfieldplugins.com/
Corel (Paintshop Pro with free Particle Shop Plugin) http://learn.corel.com/photo-home/
Photomatix (Photomatix Pro HDR editing) https://www.hdrsoft.com/index.html
On1 (Photo RAW 2018) https://www.on1.com/products/
Posted: 12/29/2017 14:30:52
Thanks Steve!
Somehow, I got on the mailing list for Digital Photo Magazine. Here is a great article about cross lighting from them.
https://www.dpmag.com/how-to/shooting/cross-lighting/
Posted: 12/29/2017 15:40:30
Somehow, I got on the mailing list for Digital Photo Magazine. Here is a great article about cross lighting from them.
https://www.dpmag.com/how-to/shooting/cross-lighting/
Posted: 12/29/2017 15:40:30
Thanks Georgianne. An excellent article. I tend to use natural light with fill flash and / or reflectors - mainly because the portraits I take are usually at outside events, where it's not so easy to set up the flash units.
Another way is to use Portrait Pro to change the lighting in the processing! Posted: 12/29/2017 16:06:49
Another way is to use Portrait Pro to change the lighting in the processing! Posted: 12/29/2017 16:06:49