Group 86 Bulletin Board
12 threads - 34 total comments
This page is dedicated to discussions about our theme (Phoneography) that are outside the scope of our monthly images.
06 06 20: Drop Box Link to Tutorials: https://www.dropbox.com/sh/c9jerz3yvaqnu1i/AAD_OONdhVT0NKpjs836j65Ha?dl=0
Thanks to Tom I have a better way to see my tutorials.
I had to copy and paste the link into my browser!
I have 2 folders. one is for Android Systems and the other for iOS systems.
The good thing about doing it this way is that Android people can have a look at the iOs tutorials about iColorama and then look for an Android App that does similar things!01 June 2020.
A. General Information:
======================
If you have an Android phone, you need to check out the camera settings and make sure you are taking photos on the highest Settings. I save most of my photos as PNG because this is a lossless type file. Sometimes when you use some apps you can only save in JPEG.
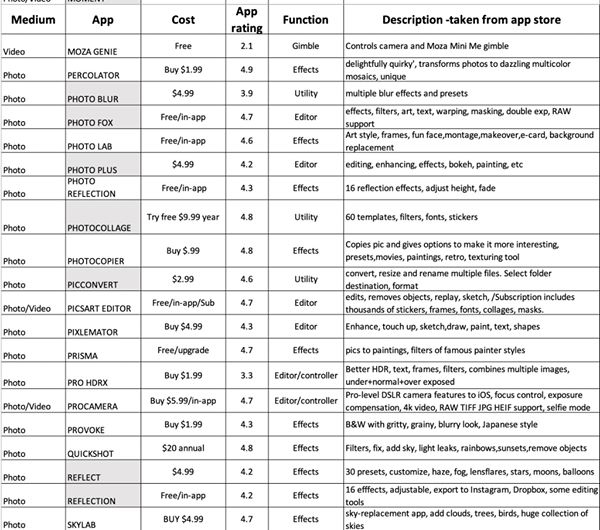
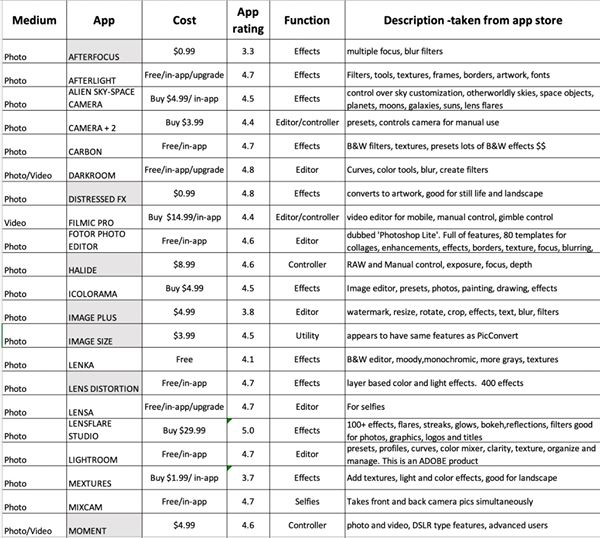
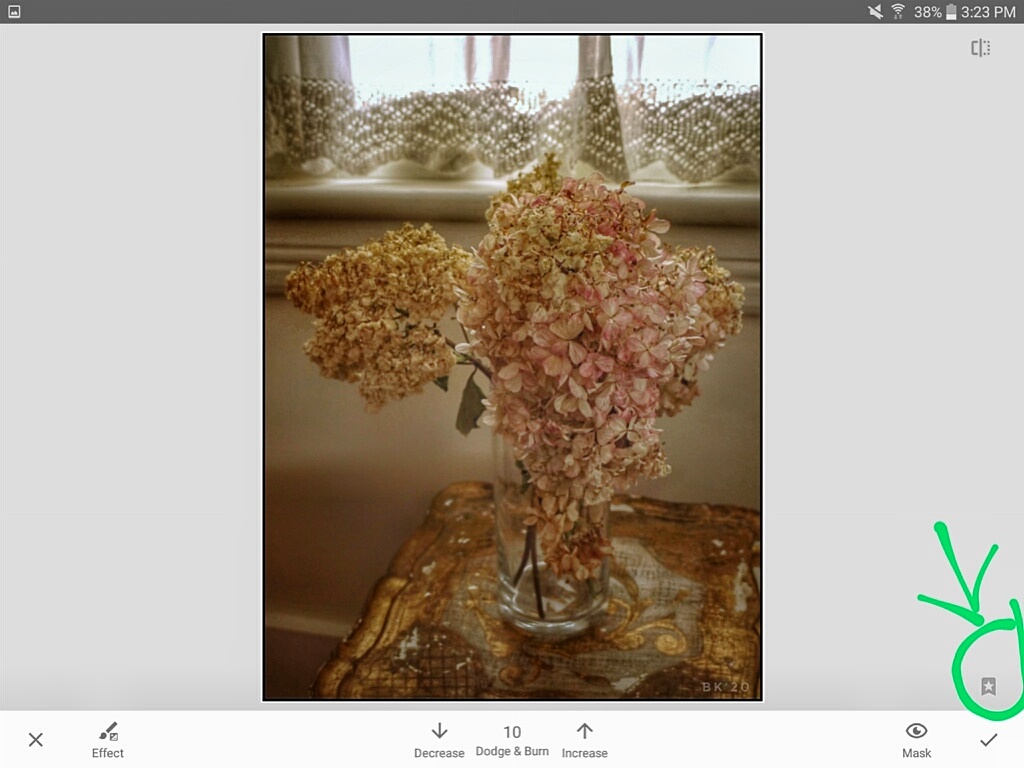
I am mainly working on my iPhone with the programs "Snapseed" (available to everyone and its free), "Superimpose" (this works perfectly on the iPhone but other makes can only get an older version so it would be worthwhile investigating another layering program) and "iColorama" (this program is magic but they will NOT make it for Android, I'm afraid). I have tried to find a comparable program on other platforms but I haven't found one like it yet.
Another program that I use is "Touch ReTouch" . . . excellent for cloning etc and I THINK it is available to everyone.
I don't buy any Apps that I have to pay for the yearly. I DO pay for Apps in the first instance.
When I DID have an Android phone, I was shocked at all the apps with ads in them . . . I didn't get those apps either!
So, we need to be taking and editing our images in the smartphone . . . no Computer Photoshop here!!! (You can get Photoshop and Lightroom for your phone).
If you take your photos in Lightroom (and a lot of other programs) you can save them in RAW.
______________________________________________________________________________
B. Snapseed Basics (06/10/18 Phillipa Frederiksen) Android users...it ALMOST the same as this.
==================
1. Snapseed is free. The icon has a green leaf.
2. Click on the icon to open.
3. Settings >3 dots at the top RHS > settings > image sizing > biggest size > Format and Quality > PNG
4. If you go to "Looks" it will save the image as a JPEG.
5. If you save/export in &ldauo;Tools" it SHOULD be a PNG
6. When Exporting (in IOS) an image always go to "Save a Copy" (Android: Export > as a PNG) so that you are not destroying the original. Sometimes, when you are doing multiple and quick "save a copy" it will refuse to save so then go to "Export" and it will save them as a copy there.
7. When using any of the tools you can click on the specific tool icon(eg.InTuneImage) or simply run your finger down the screen and you will see 2 or more options. To adjust these options run your finger to the right or left.
8. DETAILS: In the tool "Details", you can emphasize the details in an image or you can go the other way and soften it. It defaults to "Structure" and that is all I ever change, I never use the "Sharpen" option because it is too severe.
9. CURVES: This is similar to the photoshop "Curves". Adjust the line by pushing it in or out. HOWEVER, if you click on the book you get different creative options. Alternatively, you can click on the Circle and change the separate colours in the image. The latter can lead to some very creative colour changing. If you click on the eye (in the middle) you will turn the curve line off.
10. WHITE BALANCE: Click on the AW to automatically change the image to what Snapseed thinks is correct. The middle "Tools" icon is where you go to change the Temperature and Tint. Moving the eye glass around allows you to change the colours by sight.
11. CROP: Fairly obvious!
12. ROTATE: Use this if you need to turn the whole image around.
13. PERSPECTIVE: For tilting buildings etc, rotating slightly, changing the scale of the image, "Free" > to change the edges and even different parts of the image. The amazing part of this tool is that when you change the edges the App. replaces the parts that you have moved from the edge. This can sometimes cause other problems that might have to be adjusted in "Touch Retouch".
14.EXPAND: If your subject is too close to the edge of your image you can add extra space to the edges. Again, you may have to do some repairs in Touch Retouch.
15. SELECTIVE: This needs a tutorial on its own. I usually sharpen parts of the image, such as the eyes, in here but upping the contrast etc.
16. BRUSH: There are 4 brushes. Use with care! You can paint parts of the image with your finger in this tool.
17. HEALING: A simple spot remover. You need to be careful of the edges and if you need complicated cloning and spot removing then again you will need Touch Retouch.
18. HDR SCAPE: I usually stay away from this because I prefer to do my adjustments in Tune Image.
19. Glamor Glow: A simple way of adding a glow to the image. There are adjustments within the tool.
20. TONAL CONTRAST: Run your finger down the screen then adjust sideways.
21. DRAMA: For adding more contrast etc. There are adjustable tools and simple choices. Use with care!
22. VINTAGE: For adding an "Olde Worlde" effect to the image. 23. GRAINY FILM: Similar choices to Vintage.
24. RETROLUX: Similar choices to Vintage.
25. GRUNGE: Similar choices to Vintage.
26. BLACK AND WHITE: I prefer to adjust my images in Tune Image.
27. NOIR: More Mono adjustments
28. PORTRAIT: You need a recognisable face to be able to work in this App! You can adjust the eyes, mouth etc.
29. HEAD POSE: Change the position of the head.
30. LENS BLUR: You can change the area of the image that you want blurred.
31. VIGNETTE: You can change the outside AND the inside of the image, darker or lighter.
32. DOUBLE EXPOSURE: Here you can add another image on top of the image that you are already editing. You can change the size of the added image but not the shape. There are simple blending modes and you can also change the strength of the blend and the opacity of the top image.
33. TEXT: You can add text to the image
34. FRAME: You can add simple frames to the outer edge of the image.
___________________________________________________________________________________
03. Detailed Instructions for Snapseed.
======================================
1. The photo that is missing here, shows a woman with the side of her face completely missing detail because there was too much light. I suggest that you find a photo of yours that is burnt out and follow the instructions!
2. Go to settings by clicking on the 3 dots upper RHS of open screen of Snapseed
3. This photo has been completely burnt out. There is not much we can do but we will try our best!
4. Go to tools > Selective > Click on the brightest part of her face > reduce the selected area by squeezing the red area in to her face > adjust the
brightness, Contrast Saturation and reduce the Structure > tick > export > save a copy.
5. Do it again with a wider selected area.
6. Reduce the saturation of her hair > Selective > just her hair > reduce Saturation > up the structure a little > Tick > Save a copy.
7. Do the same with each of her eyes (don't let the surrounds go red!), her lips and teeth.
8. Lighten the black object behind her using selective.
9. Go to Tools > Brush > Exposure > No. 1 > Lighten everything around her. Tick and repeat until the background is very light. If you make a mistake on one of the runs go to Eraser and rob over it to bring it back > Save a copy.
10. Go to Tools > Tune image > up the contrast a little > take the highlights down > shadows down a little > tick > save a copy.
11. Go to tools > Healing Brush > Enlarge the subject right up and try to remove any objects that are still near her (don't worry if you can't remove everything we will do it in Touch Retouch) > Tick > Save a Copy.
12. Let's give her a bit of Glamour Glow > No.3 Tick > Save a Copy.
13. Tonal Contrast > Take the high and medium tones down a little > up
the low tones > Tick > Save a copy.
14. Lets look at Portrait > You can experiment with each option or just go to Combo 3!
15. Let's look at Head Pose > fiddle with the options.
16. You can at the double exposure option and add a texture but I don't
like what I did.
17. Click on the third icon from the top righthand screen > Click on "view edits" > click on the Double exposure Option at the top > click on the bin to remove it. Save a copy.
____________________________________________________________________________________________
Thread Title: Remini App
Came upon an amazing app for smartphones - Remini. It uses AI to sharpen very blurry images. I found out about it from one of the PS video guys I watch: https://youtu.be/Q8HFN4y1WVw Posted: 12/11/2020 23:42:39
Thread Title: For Ruth
1)Healing tool: used in each upper right corner to remove small bits of background, making corners black.
2)Black/White tool: selected "contrast" (left it at "0" no adjustment with slider)
3) Portrait tool: selected "spotlight 2" which darkened outside edges (no adjustments-- left it at pre-settings under the 3 little lines: face spotlight +70, skin smoothing +10, eye clarity +30)
4) Vignette tool: very, very slight adjustment for darker edge
5) 2 frames: black first, adjusted (which can sometimes cover a bit of edge that's too hard to edit); then, white frame adjusted for thinness.
Posted: 12/09/2020 16:12:36
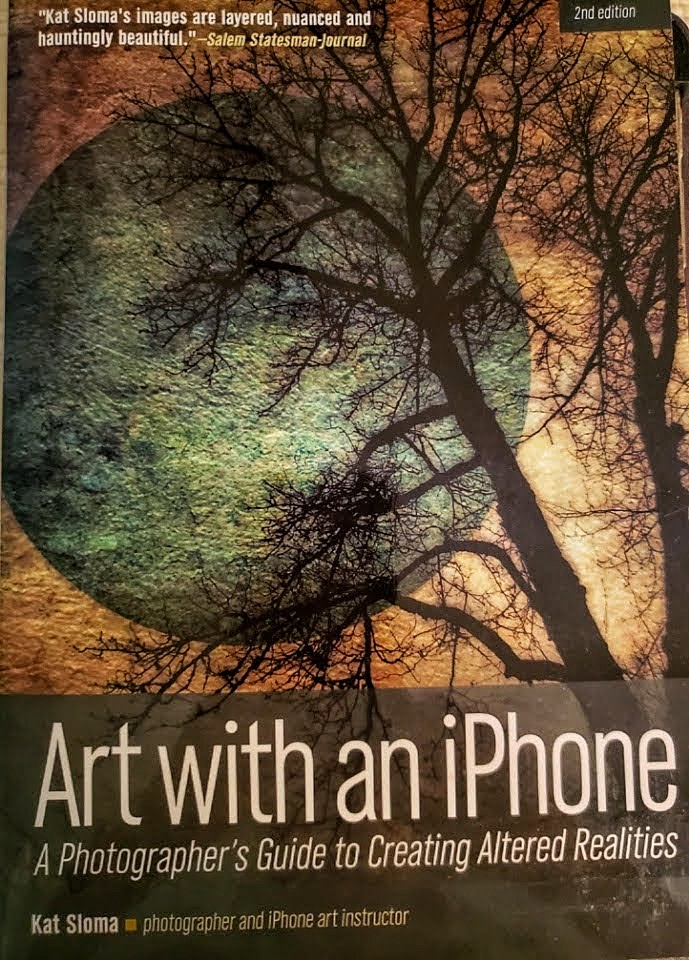
Thread Title: Art with an iPhone
https://mobitog.com/ Posted: 06/06/2020 12:44:01
I shall have to wait and see results form your work!
Of course I COULD re-activate my Android phone........ Posted: 06/06/2020 17:31:03
Posted: 06/07/2020 20:12:10
TouchRetouch app appears to be available for iOS and Android through the Play store. Photo Editor app was already on my phone so haven't used TouchReTouch. They have similar features.
By-the-way, welcome Tom! Posted: 05/28/2020 15:48:18
Another question by a newbie to the group: Are images captured and/or edited on an iPad or Android tablet allowed? Posted: 05/28/2020 13:00:38
In your General Information above, you mention the app Touch Retouch. When I look for it, there are several different apps with that name. What does the icon look like for the version you're talking about? Posted: 05/28/2020 12:23:09


