Group 24 Bulletin Board
4 threads - 11 total comments
This page is dedicated to discussions about our theme Flowers & Plants that are outside the scope of our monthly images.
Thread Title: Fine Art Photography Article: Compositional Structure
PSA Fine Art Photography Article: Compositional Structure
Hello, everyone! Hope you take the time to read my article in
The March issue of the PSA Journal, which can be found on the
PSA website if you do not currently receive the hard-copy of the
Journal. I very much look forward to your comments.
You can also Follow the Link below. Thank you.
https://psa-photo.org/resource/resmgr/pdf/journal_/2023/2023-03-psa-journal.pdf
Lance A. Lewin
PSA B&W Photography Mentor
PSA South Atlantic Area Membership Director
Contact: lance.visualizingart@gmail.com
Posted: 03/19/2023 16:32:04
Thread Title: Manual Focus for Flower Portraits
Manual Focus for Flower Portraits (Edited Version for PSA Group Contemplation)
For most "non-sport" type photography, I prefer to use manual focus on my Digital Single Lens Reflex Camera (DSLR). This includes 99% of my work, whether it be general landscape, portrait photography, macro, architectural, abstract and especially, shooting all types of flowers.
Let us examine what I speak of in the following examples: in both (Fig-1) and (Fig-2): both the single and group of Morning Roses offers the photographer a multitude of perspectives (and design options) for composition.
For example, in (Fig-1) the design was to create very soft-focus effect by creating an extremely shallow depth of field using a large aperture setting (which equates to a small F-stop value like F/1.4 or F/2.8 for examples). Also, I am aware regardless of where I focus on this rose, I should expect extreme bokeh (or blurring around the point of focus). Using a tripod, I tried several focus-points (bracketing): top pedal, bottom pedal, center, center-back, and also varied my aperture from F/2.8 to F/3.5. Later in post-production I reviewed several (bracketed) shots, I chose the one shown in (Fig-1). This digital image was captured using ISO-100, 1/200 sec from a Macro lens at F/2.8 (which is wide open for this particular lens). BW conversion via NIK softwareââ¬â¢s Silver Efex Pro-2. The focus-point was concentrated between the top (forward pedal) and the next two pedals below it. Again, I bracketed my shots (choosing different focusing points) making small focusing adjustments by turning the lens barrel very little each time. Patience is a virtue.
The reason we have better luck using manual focus to capture these types of subjects is the auto-focus system can never intelligently recognize which flowering bud or buds the photographer wants in focus. So, we move the lens barrel manually to exact points seen through our viewfinder. Manual Focusing hint: try having both eyes open while focusing: 1. It relieves eye stress, especially when you are shooting for hours. 2. It is all about perspective, and with both eyes open while manually focusing your camera, a clearer view result.
The 2012 example in (fig-2) shows another situation when manual focus is vital in capturing your intended design: the in-focus rose is bias to the left of the frame and not being centered gives the auto-focus system difficulty focusing on the intended object. This digital photograph was captured using a 50mm F/1.4 lens shot at F/2.2 1/320 sec ISO-100. (Fig-3) shows the intended use of this particular Morning Rose composition.
The same issue can also be a nuisance in portrait photography - when more than one sitter is being photographed, and especially when the subjects may be in a horizontal-tandem, relative to the camera lens. Again, focusing should be completed manually to exact the precise point of focus which can vary greatly on the aperture setting used (as it relates to the Depth of Field (Dof) in shaping the characteristics that define a final composition. What I mean here is, the photographer may have to alter the point of focus on one particular individual or between two in hopes of getting everyone in focus. The process is quite simple and once you get the hang of it (likely within a few hours of practice) you will automatically run through these procedures with the greatest of confidence.
As always, for more clarity and to extend this discussion, feel free to reach out to me at (lance.visualizingart@gmail.com); at your convenience.
Lance A. Lewin Fine Art Photography Instructor/Lecturer
PSA B&W Photography Mentor
Visualizingart.com
Posted: 12/05/2022 07:32:05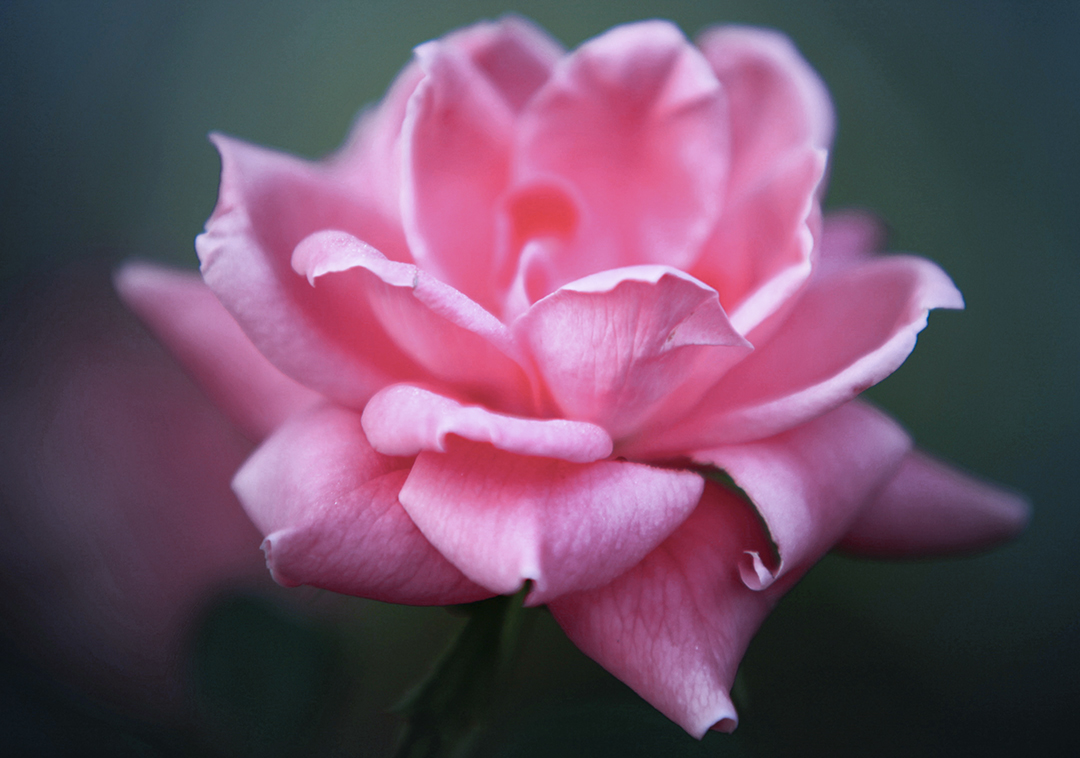
Posted: 12/05/2022 07:33:02
Posted: 12/05/2022 07:33:20
Thread Title: Classic Era Technique: "Bracketing"
I use bracketing in 80 % of my photography (except wild life). The only negative aspect (if any) the extra time to process so many images Posted: 11/09/2022 07:28:57
Hello, Isaac! Really appreciate you sharing this part of your workflow process.
However, in (many) cases, the only extra time (used) is looking at these (extra) frames to choose one over the next, for the purpose of identifying the "keeper" for additional post-production, if any is needed. In any case, it is well worth the effort! Posted: 11/09/2022 08:58:24
However, in (many) cases, the only extra time (used) is looking at these (extra) frames to choose one over the next, for the purpose of identifying the "keeper" for additional post-production, if any is needed. In any case, it is well worth the effort! Posted: 11/09/2022 08:58:24
Thread Title: Classic Era Technique: "Bracketing"
This particular "practice" is something I often speak about, and there are many who still do not use it or completely understand what it is when I mention it, and this is common, as it is often mistaken for a technique born from 21st century Photography ... but it is not.
ââ¬Å“Bracketingââ¬, is an important tool (technique) I feel photographers do not use often enough and is critical in having a successful Photo-Shoot for almost every type of photography. It is capturing 2, 3, or 4 images of the same composition (the camera position, and thus the composition is not altered in any way) but instead, it is the process of using different camera settings between each click of the shutter release button, thus revealing different exposures and depth of field, to name two camera dynamics which can dramatically alter the overall interpretation of the composition.
This practice is equally effective for both hand-held and tripod use. Next, after you decide to do a test shot (and look at your review screen with digital cameras) to be sure the image is not over or horribly underexposed, do not look at the review screen again. 1. It waste time and will likely disrupt your visualization and composition skills (even if you are using a tripod). 2. The review screen resolution (and size) cannot match the clarity of your laptop or desk top monitors, as such, you may think a particular shot is not good and shot another or worse, delete it off the camera, when in fact, the frame in question may have been OK. Conversely, the review screen may appear to show a really good exposure and overall composition, thus deciding to leave the subject to find another ... when later in post-production review, you see this is not the case, and realize you may own more than one unusable image. A crummy day, for sure.
When everyone used film-based camera systems, it is easy to see how critical "bracketing exposures" was for a successful photo shoot. With absolutely no option to review each frame being exposed, bracketing was the most important tool in a serious (film) photographerââ¬â¢s bag. In my opinion, today we take too much time trying to correct the exposure or composition between every shot: I feel this is taking away from learning to ââ¬Å“seeâ⬠and becoming one with the subject and immediate environment, while also, can routinely interrupt the artist-photographers creative workflow.
This all said, every photographic situation involves many environmental and technical dynamics that in combination, must be considered when capturing a photograph: nothing is set in stone, and bracketing is highly recommended to ensure you capture the desired effect in a composition.
By all means reach out to if you have questions or want practical examples.
lewin.author@gmail.com
Lance A. Lewin
PSA B&W Photography Mentor
PSA South Atlantic Area Membership Director Posted: 11/04/2022 21:59:09
Until covid restricted my movements, I had used exposure brackets for several years, using ACR’s HDR Merge to produce a 32-bit extended-range result with which to process a final image. I avoided anything that appeared like the stereotypical HDR “look”, but found the 32-bit result gave me much more image material with which to “play” with when developing my results. Posted: 11/05/2022 07:36:03
Indeed, less of the often, 'contrived' or unauthentic vibe these types of image designs can produce is the way to go for sure ... at least, to set your work apart from the others. The 32bit is often the prescribed recipe for post-production edits with high resolution files. It's a good practice to continue following.
And to reiterate, the above discussion has nothing to do with the workflow system/techniques you described. "Bracketing" in the context above is (only) to help the photographer "work a scene or subject" and hopefully not leave anything on the table as it relates to artistic design or "compositional structure".
Posted: 11/05/2022 09:33:25
Excellent write up. I sometimes do that for deep focus changing the depth of field and merging them in post production. Posted: 11/07/2022 17:52:48
Hi Pinaki ... and your example (like Tom's) is clearly the "Digital" use of bracketing: the exclusive use of "combining" or "merging" more than one image file in post-production.
Thank you for sharing! Posted: 11/09/2022 10:59:07
Thank you for sharing! Posted: 11/09/2022 10:59:07